Tuesday, 8 February 2011

Acquisition & Application of Skills Project Review

For one of my college projects, i was asked to put together a file containing
pattern cutting techniques, tear sheets and samples relating to Steampunk along with
an evaluation reflecting on my experiences & variety of other things to gain an understanding
of the techniques and processes used when designing and constructing a garment 
in the industry. 
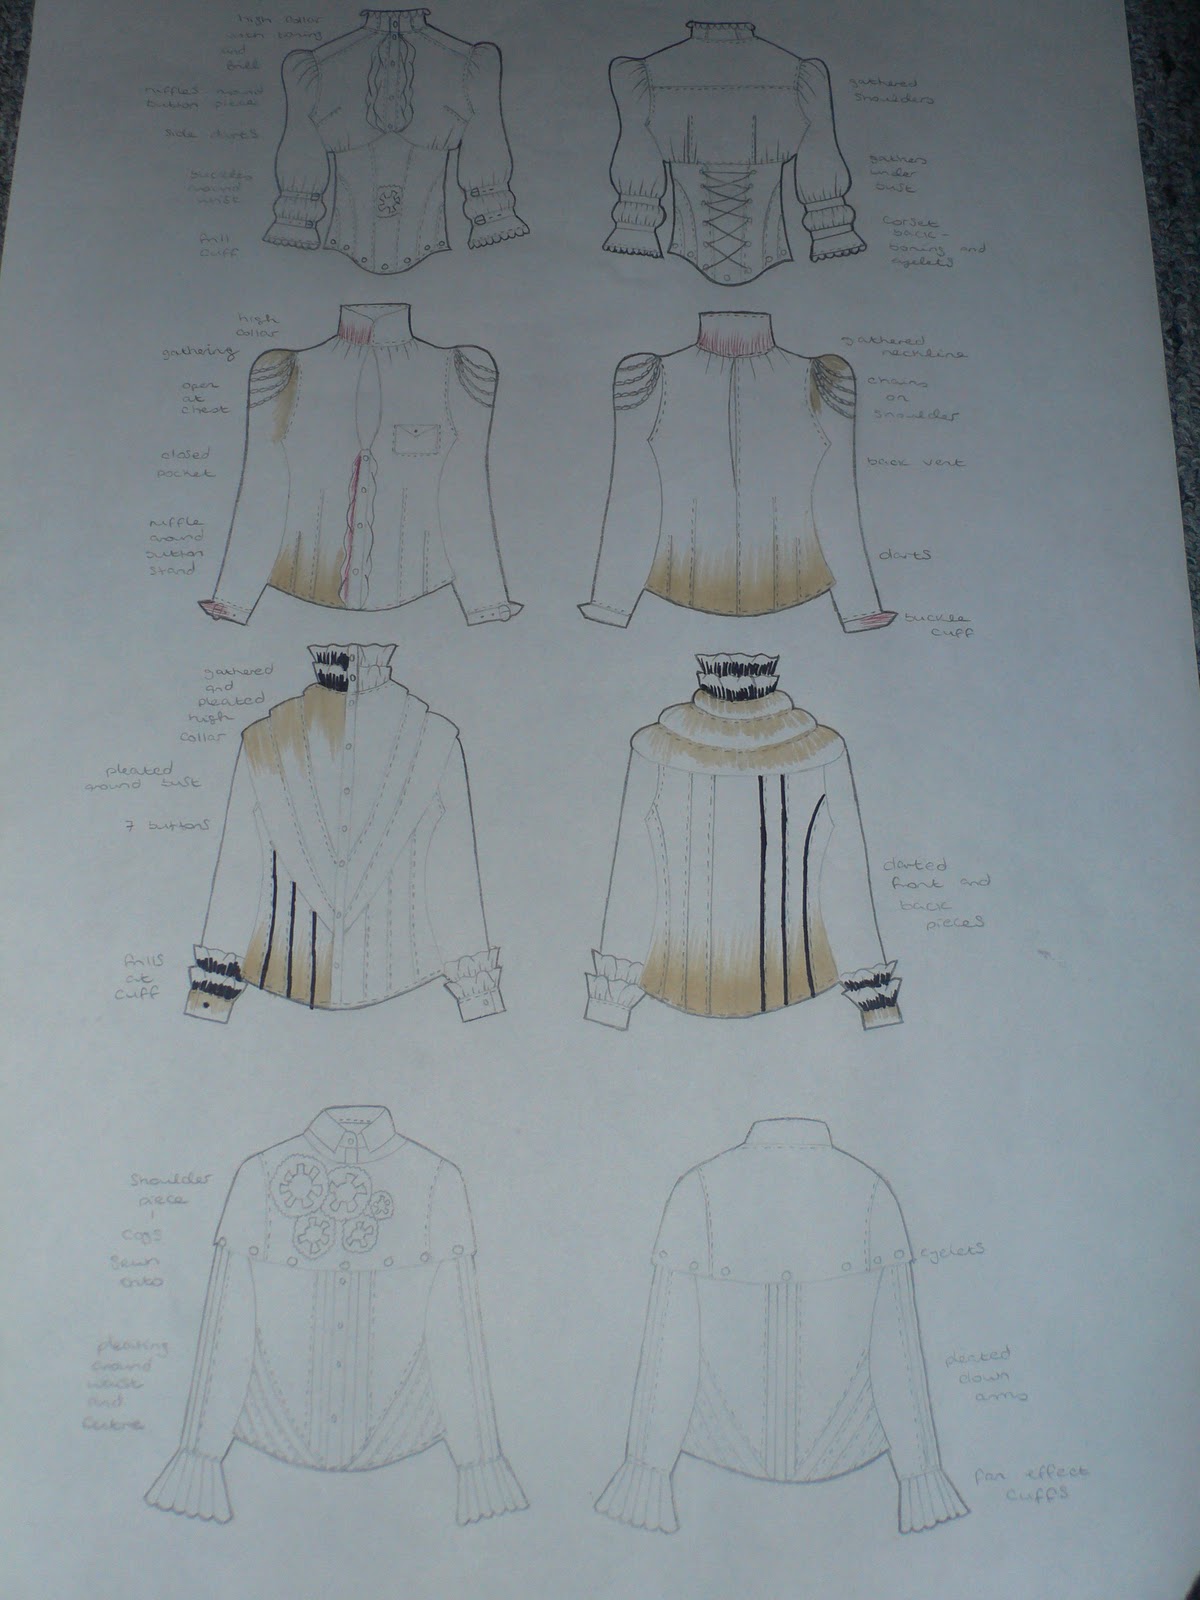
When collecting the tear sheets i looked specifically at techniques that i 
could use in my current Steampunk project and set out to do 
working drawings of certain elements from the garments i found to understand
how they would be constructed. Although, as i did find this successful, i was advised that
the drawings were to the standard, they were more fashion illustration type than
working drawings. 
For the samples, i constructed a fan effect collar, which i later used in my current project,
dart and seam samples, a juliet sleeve, fan effect sleeves, pocket styles, a curved peplum and
gathered neckline along with a variety of others. 
The feedback that i was given for this project was that i successfully demonstrated
skill and an understanding with my pattern cutting and sewing techniques, and to practice further to
broaden my experience and work closely with college tutors to ensure the
techniques are effective.

Working Drawing

Working Drawing

Tear Sheet

Pattern Cutting Technique

Fan Effect Collar Sample

Seam Sample


Curved Hem Sample

Gathered Neckline Sample

Monday, 7 February 2011

Final Toile & Alterations

After discovering that i needed to alter certain patterns, i began by
taking 1cm off the shoulder so it would sit better on the arm and widened the sleeve pattern
so that the sleeve head had more fullness in it, creating more gathers.
I also unpicked the button placket and collar to ensure they were sewn on correctly before i create
the final shirt.
After doing this, i arrived at my final pattern pieces, ready to create my shirt!

Sleeve head

Button Placket

Unpicked Collar

Final Pattern Pieces

I picked my final fabrics which are brown leather for the buckles,
cream lace for the sleeve heads and cream cotton for the main body of the shirt.
When doing my final shirt i will overlock all the edges to neaten the insides up,
create a single frill to have less bulk and pull all the corners out of the fabric
properly so that it creates nice, neat edges on all pieces.

Fabrics


Final Shirt Toile, Front & Back

Tuesday, 25 January 2011

Buttons!

After days of waiting around for my purchase to arrive,
i eventually recieved my steampunk cog shaped buttons,
ordered from Los Angeles, America, at a nifty price of
$2.69 each. 
They are the perfect colour to match my cream and brown shirt!


 6.7mm x 5.1mm

They were most definately worth the wait!

Toile Making

After cutting all the pattern pieces out in calico fabric,
i started sewing them together, with a 1cm seam allowance.
I began by sewing the darts into the front and back pieces, sewing the fan effect collar,
jabot frill and button placket onto the shirt after joining the front and back pieces together to create
the below pictures.
Shirt Front

Shirt Back

When making the shirt out of cotton fabric, i will steam the collar
to keep its shape.
I also sewed a top stitch on the bottom pleats to keep them in place.

Fan Effect Collar


After sewing all the shirt pieces together to create the toile,
i put it on a size 12 model to see what needed to be improved upon in the patterns.
I found that the jabot frill will be constructed from one piece of fabric to create less of
statement, as it sticks out too much, the shoulders will be more gathered
and i will take 1cm off the shoulders and back neck so that the collar sits better on the neck.
I will try out the sleeve head to see if i get the desired fullness.


Saturday, 22 January 2011

Pattern Cutting

After picking my final design, i have started the pattern cutting, using
a basic woman's size 12 block.
I began by experimenting with the jabot frill and fan effect collar, deciding how i would like them to look.
With the jabot frill, i decided to have the frills all the same
shape and length which i will put down the sides of the button placket.
Aswell with the collar, i will steam it once cut out in fabric
to help the shape set and stay in place.

Jabot Frill

Fan effect collar

Once i had all the patterns ready, i layed them on calico fabric, 
placing them all in the same direction, ready to create the toile.


Thursday, 20 January 2011

Steampunk Final Shirt Design

After alot of researching and designing, i finally chose my final shirt design.

Final Design

I chose this design, as i wanted to incorporate victorian elements mixed with gothic styles,
which i feel i have done with the corset back, juliet lace sleeves,
tight fitting and the leather buckles around the arms.
The design consists of waist darts to make the shirt tight fitting, a jabot frill around the
button placket, buckles on the arms, juliet sleeves, a fan effect collar and the impression
of corsets on the back.
When i construct the shirt, i will use cream lace, brown leather and cream cotton.

Steampunk Work

I began focusing on corsets, cogs and victorian styles as a theme for my
inspiration board, helping to achieve a colour pallette for my
colour board, mainly consisting of dark tones.
(Deep green, wine, black, red, cream and brown).
After researching into Steampunk, i found that fabrics often use for this theme
are pinstripes, heavy fabrics, leather, satin and lace, mixing gothic with victorian, which i tried
 to incorporate as fabric samples on my board.
Inspiration board

Fabric board

Colour board

From carrying out research and constructing the above boards,
it allowed me to come up with a range of flat designs. I mainly wanted to
focus on looking at the victorian styles, corsets and cogs as a main
theme throughout my designs, having no limitations.
I also added a hint of colour on some designs, showing my colour pallette.


Initial Designs

After designing a wide range of shirts, i chose my favourite three,
to help me choose my final design.
The shirts being tight fitting and imaginative was an important feature i thought needed to be included.

Final 3 Designs

Steampunk

Steampunk, when the victorian era met science fiction.
In my recent FdA fashion project, company Phaze Clothing have requested
that i create a shirt for spring/summer 2011 in the steampunk style for various trade
shows in London and Berlin.
As a requirement, i will construct an inspiration, colour and fabric board
along with flat sketch boards and a final garment.
An essay will also be produced, showing my understanding of the Steampunk philosophy.
As you can see from above, steampunk generally consists of imaginative designs,
futuristic innovations, high collars, ruffles, corsets, cogs and long sleeves,
edgy yet classical. 


Friday, 14 January 2011

Alexander Mcqueen Spring 2011 RTW

Being as interested in the company as i am, there is
nothing to lift your spirits more than a new McQueen collection!
Sarah Burton debutes her very first designs for the Alexander McQueen label, perfectly presenting McQueen's signature styles, now softened and relaxed, adding a new womans touch of
romance and femininity to the brand.
Because of course, Alexander McQueen shall live on!


And of course, the shoes:


Images From Style.com

As beautiful as they are, nothing quite compares
to McQueen's very own Spring 2010 shoe collection.

Burton's very first fashion show, below:
Video from Youtube.com

Juicy Couture Love


One of my fav accessory designers.
A very neccessary new purchase of mine.